I recently migrated my Proxmox installation from a single drive to a dual drive in ZFS Raid1. The actual process of switching from a single drive to a dual drive was pretty easy. I backed up all of my VMs, installed the new drive, and then reinstalled Proxmox (allowing it to reformat my drives along the way).
The hitch came when restoring from backups. Two things went wrong:
I didn’t have backups for Proxmox Backup Server, so I needed to install it from scratch in order to recover my other VMs.
When I tried to bring up my Proxmox Backup Server, I had difficulty mounting my NAS (where the backups are actually stored) because I only know the NAS by hostname. Hostnames are resolved via my DNS Server (Pihole) which runs in a VM on my proxmox host.
As you can imagine, the fix was pretty simple – installing Proxmox Backup Server from scratch is quite easy and once I figured out the IP of my NAS, I just had to mount it and all was well. But I could make it easier for next time…
Backing up Proxmox Backup Server
The reason I didn’t have backups for Proxmox Backup Server was to avoid circular dependencies. All of VMs were set to backup nightly using Proxmox Backup Server.. but I didn’t want to backup Proxmox Backup Server to itself, so I excluded it from the backup job.
To resolve this for next time, I created a separate backup job which backs up Proxmox Backup Server directly to my NAS. This backup job is scheduled to run after the backup job for the other VMs and follows the same retention policy.
Mounting NAS using IP
I like my home network to be “IP-less”. That is, my router assigns IPs and at the same time advertises their hostnames as local DNS entries. That way, I don’t have to remember IP addresses. However, my router advertises Pi-hole (running in Proxmox) as the primary DNS Server and Pi-Hole uses the router as its upstream DNS.. so if Pihole is down, I can’t use hostnames anymore.
To resolve this, I setup my router to give my NAS a static IP (For some reason, I feel weird about making the NAS itself request a static IP) and then I setup Proxmox Backup Server to mount that IP instead of mounting my NAS by hostname.
In the future, I should be able to restore Proxmox Backup Server from backups hosted on my NAS and it won’t have any problems starting up and mounting my NAS.
The Final Flow
If I need to reinstall Proxmox again, the flow should be a lot less problematic.
Ensure that my NAS is up and running: it has all the backups.
Restore Proxmox Backup Server from the backups hosted directly on my NAS. This should work flawlessly because it is configured to mount my NAS via a static IP.
Add “Proxmox Backup Server” as a new storage in Proxmox. This will allow me to restore my other VMs.
As you’ve no doubt noticed from my past 3 posts (all of which are about my “homelab”), I’ve definitely caught the homelab bug. My original goal was simply to get rid of my monthly payments to Dropbox and have some alternative to Google Photos – but this has turned into a hobby of sorts. Now, I’m kinda obsessed with getting all of my regularly running services and game servers well integrated into my homelab environment.
Last post, I talked about organizing the actual hardware into a rack and using a patch panel to route everything. Since then, I actually ended up moving the Proxmox box from an InWin Chopin case to the 2U Rosewill RSV-Z2600U case. The migration was very easy (the new case is HUGE compared to the old one), but required me getting a new power supply and 3 Noctua 80mm fans. So far, I’m very happy with the thermals and noise levels. Most importantly, it looks sleek sitting inside my rack – although now I’ve realized that my rack is a short-depth rack (14 inches) which doesn’t fit the 16 inch 2U case. So I’ll have to do something about that later…
On the software side of things, I’m slowly working towards moving to the ideal homelab. I’ve setup some goals for myself:
Configure an internal reverse proxy so that I don’t have to remember port numbers and so that I don’t get SSL warnings everywhere.
Finally split my network into four: a local network, a guest network, an IoT network, and a “DMZ” network which will run services exposed externally.
Experiment with a “jumphost” – a remote VPS which is connected to the DMZ network via VPN. All connections to the DMZ hosts must then be through the jumphost and the only exposed ports on my home network should be a VPN for both the DMZ network and my local network. For now, this will only be used for game servers.
Experiment with some way to bridge my homelab and my already deployed VPS (this blog and a few other websites).
The journey begins with the internal reverse proxy.
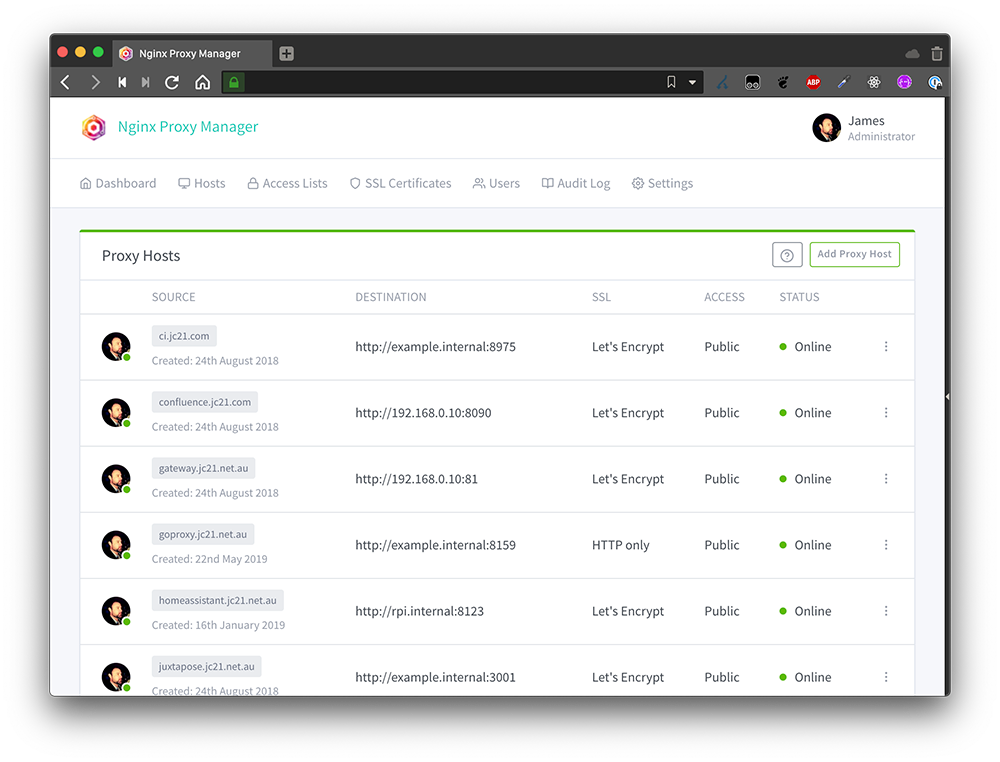
Software Choice: Nginx Proxy Manager
Apparently there are a few reverse proxies to choose from these days. In addition to the classic Apache and Nginx, I also found information about Nginx Proxy Manager, Traefik, and Caddy. I recently got experience with Nginx when I moved this blog from CentOS/Sentora to ArchLinux/Nginx, so I decided that I would stick with the Nginx stack. In addition, Nginx also recently added support for reverse-proxying TCP/UDP while most other options only had HTTP support. This would be useful for gameservers.
So the choice came down to using vanilla Nginx and using Nginx Proxy Manager.
Nginx: I already know how to set it up, but I often forget the config file syntax and have to Google about how to use it. Luckily, I don’t plan on doing anything fancy (just subdomain –> hostname/port mapping) so this shouldn’t be too hard. Also I can easily backup the configs.
Nginx Proxy Manager: Basically nginx (fast), but with an easy to understand UI. I wouldn’t have to Google anything, but I risk the UI creating janky nginx configs or not supporting an nginx feature that I want later down the line. For backups, I can just host this on a Proxmox container and just backup the container image.
Ultimately, the easy-to-understand UI in Nginx proxy manager won me over. It also supports TCP/UDP (Which nginx calls “streams”) which was a plus.
The “Proxy Hosts” page from the official Nginx Proxy Manager website
Nginx Proxy Manager Setup
Setting up Nginx Proxy Manager was easy-peasy using Docker Compose. I’m definitely not the biggest Docker power-user, but I like using Docker Compose for easy-peasy spinup. In Proxmox, I have a Debian template image with docker/dockercompose pre-installed that I use for all my VMs. I clone the template, fill out docker-compose.yml, and I’m off. It’s probably not great that I’m only running a single docker image in each container, but for now it’s totally fine.
So – I created a new “npm” container and copy/pasted the Docker Compose config from the website. It worked like a charm:
I started setting up “Proxy Hosts” for services which had ports that I could not remember. The first was proxmox (who can remember port 8006? not me) – so I created the “proxmox.[internaldomain.com]” proxy host and redirected it to the host “proxmox.[internaldomain.com]:8006”.
You might see the problem here… in my homelab network, I votwed to never use IPs directly because I would forget them. Instead, I relied on my Unifi Dream Machine’s internal DNS settings which automatically created entries for [Hostname].[InternalNetwork.com], where InternalNetwork.com was a domain name that I populated (which I also own publicly). I was already navigating to proxmox.[InternalNetwork.com]:8006 to access the Proxmox UI.. so if the hostname already took the “proxmox” name, what would I name the Proxy Host?
I spent an emabrrasingly long time thinking about this and googling to see what other people had done. There were three primary options I was considering:
Just avoid collisions. Keep the Proxy Hosts and actual hostnames on the same domain, but keep a mental note to avoid collisions. I hated this idea because I’m bad at remembering things and I also feared adding some new host down the line that collided with a proxy host.
Create a new subdomain for the proxy (something like proxy.[InternalDomain.com]). I also wasn’t a fan of this idea.. the whole point of creating the proxy was so I could remember less and I didn’t want to remember that everything served by the proxy had to be prefixed with “.proxy”.
Move all hostnames to a different subdomain and use the top-level domain only for the proxy. This is what I ultimately went with.
I realized that eventually I wanted to split out my network into four networks (guest, iot, dmz, and local) – so now would be a perfect time to create a new subdomain for each network starting with local.[InternalDomain.com] for all hosts on my local network. Then, the proxy could have toplevel service.[InternalDomain.com] records and delegate them to the hosts in the local network.
Of course, this took some patience as I had to change a bunch of config files which referred to hosts: hostname.[InternalDomain.com] -> hostname.local.[InternalDomain.com]. But it worked.
Since I use pihole for my internal DNS server (adblocking), I setup my proxy A/CNAME records there:
I added an A record proxy.[InternalDomain.com] -> npm.local.[InternalDomain.com].
For every service served by the proxy, I added a CNAME service.[InternalDomain.com] -> proxy.[InternalDomain.com].
I setup all of my HTTP internal services this way: Synology Drive, Synology Photos, Unifi Controller, Jellyfin, and Proxmox.
Actually, setting up Proxmox without SSL didn’t quite work. Apparently the Proxmox internals only work over SSL, so I needed to use a special config in Nginx Proxy Manager to redirect all Proxmox to SSL. To do so, I needed to figure out exactly how the UI created “custom configs” and where the “custom configs” were included. Here’s what I used (note the mismatching braces which match with braces in the top-level config where the custom config is included):
rewrite ^(.*) https://$host$1 permanent;
}
server {
  listen 443;
  proxy_redirect off;
  server_name proxmox.[InternalDomain.com];
location / {
                proxy_pass https://homelab.[InternalDomain.com]:8006;
                proxy_buffering off;
                client_max_body_size 0;
                proxy_connect_timeout  3600s;
                proxy_read_timeout  3600s;
                proxy_send_timeout  3600s;
                send_timeout  3600s;
        # Enable proxy websockets for the noVNC console to work
                proxy_http_version 1.1;
                proxy_set_header Upgrade $http_upgrade;
                proxy_set_header Connection "upgrade";
        }
Finally, SSL
As a final step, I enabled SSL. This was fairly straightforward: I used the built-in option for creating a new wildcard certificate for *.[InternalDomain.com]. Since my hosts are not publicly accessible, I had to use a DNS challenge for this – but no problem.
I then used the UI to “Force SSL” onto my wildcard cert for all proxy hosts. Viola – no more Chrome/Firefox warnings about insecure connections. Once I did this I was also able to remove the gross custom Proxmox config noted above.
Conclusion
After using this setup for about a week, I’m pretty happy. The quality of life improvements are tremendous… I’ve saved atleast a few seconds off every day. Priceless. (When will those seconds surpass the time I spent setting up the reverse proxy? Probably never…)
I still have some doubts about the setup. For example, having all of my internal services rely on a single host for routing isn’t ideal… but if Nginx Proxy Manager is ever having problems, I could always fall back to the hostname and port.
After all, this is a homelab… I don’t want to spend too much time thinking about 24/7 uptime. That’s for my dayjob.
Continuing on my slow and steady quest to have an organized networking closet, I recently finished wiring up my patch panel on my 6U “wall-mount” networking rack that’s sitting on top of a pair of IKEA LACK side tables in my office closet. (I used the Cable Matters 1U Cat6 keystone patch panel, which can be found here on Amazon). Previously, I just had all of my apartment’s ethernet cables somehow routed into the closet and terminated at the front of my network switch. It didn’t take long – probably only a few minutes of browsing r/homelab until I realized that this was not nearly the most beautiful way to organize my networking closet. So I set forth on the journey to use a patch panel…
To change from direct ethernet cables to a patch panel, I needed to get:
Several keystone connectors. The patch panel I got is a “keystone patch panel” which requires ethernet cables to be terminated with a keystone jack before being inserted into the patch panel. (I got these “slim” Cable Matters ones)
Several short ethernet cables which I could use to connect the patch panel to my switch. Sure, I could manually create 16 short cables out of a longer cable, but that sounds like a lot of work. (I ended up buying 4 5-packs of Cable Matters CAT6 cable which can be found on Amazon here)
Some way to lengthen my existing ethernet cables without replacing the entire cable. For example, the cable which goes to my desk is the perfect length to reach the front of the switch – but too short to reacharound to the back of the patch panel. Instead of replacing the entire cable, I’d like an easy way to join two cables together. (I ended up getting some Cable Matters “keystone couplers” which can be found here on Amazon)
In all, re-routing the cables didn’t end up being that much work. Using the keystone couplers to lengthen cables was easy. But I’m still not very good at the process of keystone-terminating ethernet cables.. each new termination with its process of stripping and untwisting and punching down took 30 minutes. The whole process took the better part of two days. Despite not testing my cables in the process, I managed to somehow crank out a 100% success rate.
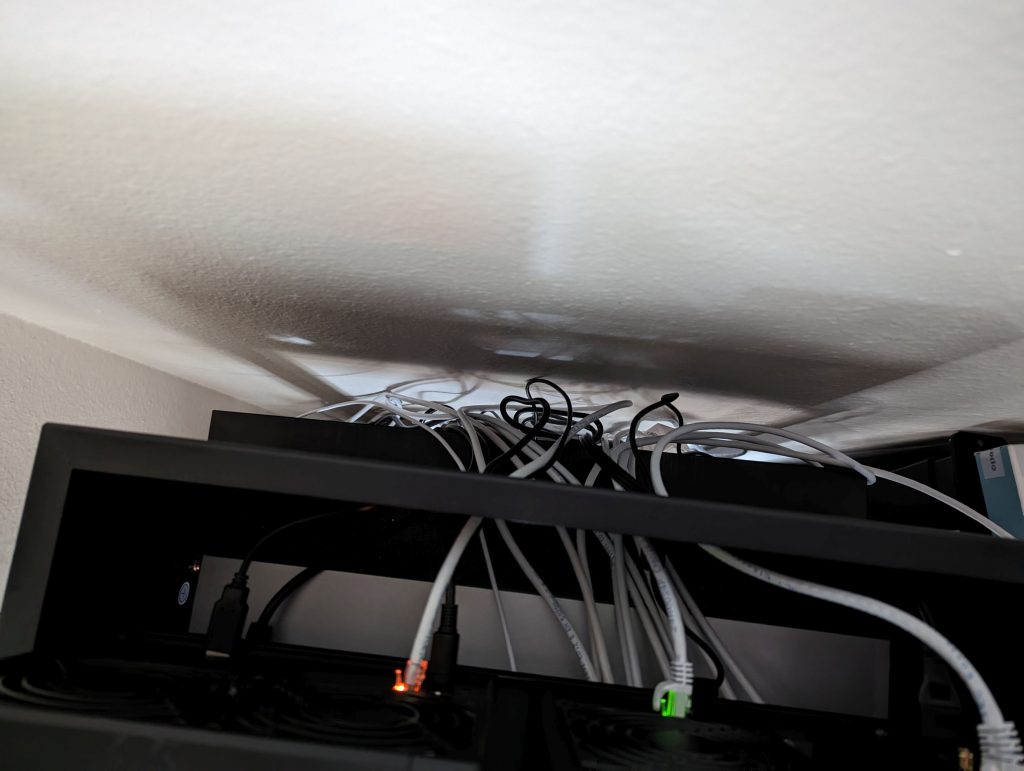
The mess behind my patch panel. The patch panel has “ziptie connectors” that I should probably make use of to clean this up.
Unfortunately, two of my ethernet cables were special “slim” cables which I did not want to strip and attempt to wire into a keystone. Luckily, the keystone couplers I purchased also functioned as a poor-man’s keystone jack, so I just used those for two cables.
After trying to plan in advance and pre-label my patch panel, I was able to connect the 16 keystoned connectors into the rear of the patch panel. I’m not sure if I did it entirely correctly because it still looks a little messy back there – but I did it. I was finally ready to make my patch panel look like all the beautiful r/homelab posts. I used 1 foot ethernet cables to connect the patch panel to my switch. This took some re-working of my already labeled patch panel to get the aesthetics just right. The POE ports on my switch are on the left, so I needed to make sure that all PoE devices were terminated on the left side of the patch panel to avoid crossing patch panels.
The homelab rack after making use of the patch panel – much cleaner!
In all, the rack now looks pretty neat… but there are still things I’d like to improve. For example, the 1 foot patch cables do seem a little too long for the switch ports which are directly below the patch panel. Additionally, this doesn’t seem to actually offer much reparability benefits. For example, if I needed to introduce a new device to my home network, I would need to introduce two new cables instead of just one.. and if I wanted to maintain grouping on the patch panel (living room ports, PoE ports, etc), then I might have to shift over all the patch panel ports to make room. Indeed, the patch panel seems optimized for frequently changing network equipment while the actual ethernet runs remain unchanged – maybe useful in datacenters, but not so much homelabs.
But overall, I’m now proud to show off my network rack and I had fun tweaking. Now all I need is a rackmount UPS, an air conditioning unit dedicated to my networking closet, and to switch my 3 tower servers to rackmount servers. Oh, I also need to upgrade my network to 10 Gig. The fun never ends…
As we go into 2023, I thought that I would share the layering of my homelab – which I have spent admittedly far too much time on. In general, I spend a lot of time dealing with complex systems during my dayjob. When I’m at home, I try to keep my systems as simple as possible so that I don’t have to spend hours re-learning tooling and debugging when things go wrong. Even if this costs some extra money, it’s worth it because it saves time.
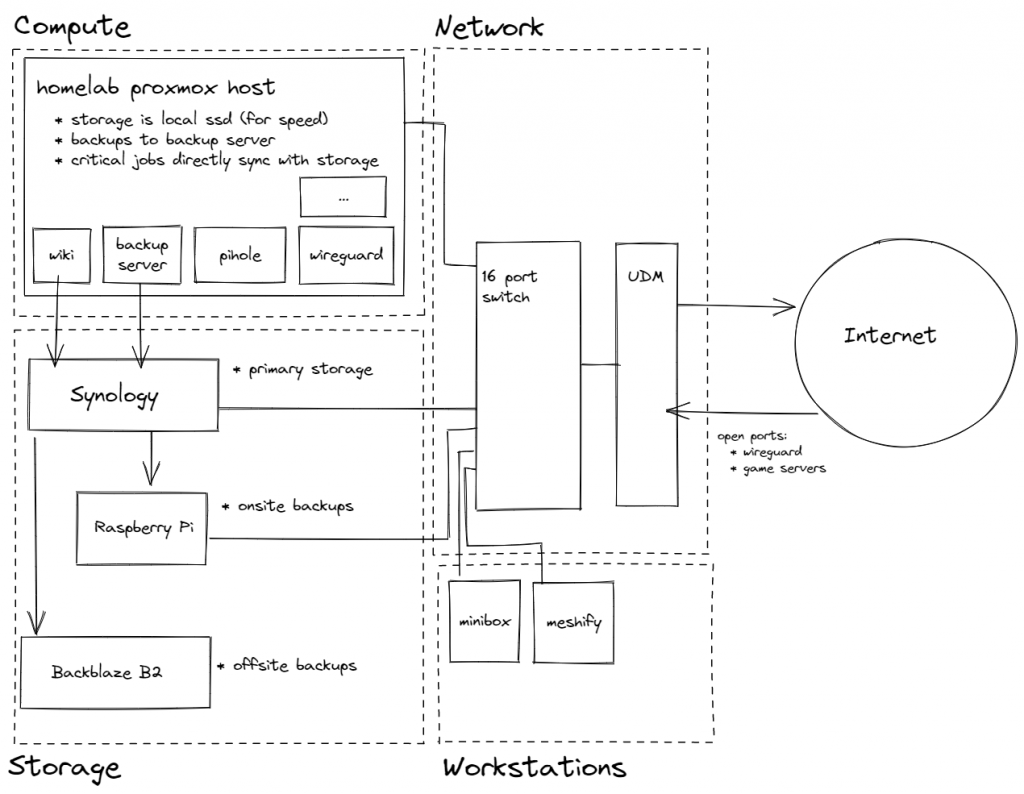
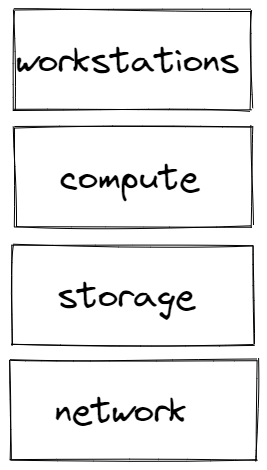
My “homelab” is split into four layers: workstations (actual computers on desks), compute (servers which run applications), storage (server which hosts disks), network (routers and switches).
If I try to get more rigorous about the definitions, I arrive at:
Workstations are the client-side interfaces to storage/compute which also have local storage and compute to host games and other local processing (eg photo editing, video editing, word processing, etc). These workstations are backed up to the Storage layer regularly.
Compute is the server-side hosting infrastructure. All applications run on “compute”. The compute should probably be using the storage layer as its primary storage, but due to speed considerations (game servers), the compute layer uses its own local storage and backs up regularly to the storage layer.
Storage is the server-side storage infrastructure. All storage applications (NFS, SMB) are hosted on storage as well as some other applications which should probably be moved to compute, but are currently on storage due to a lack of research (eg Synology Photos, Synology Drive).
Network is the network backbone which connects the workstations/compute/storage and routes to the Internet. My network currently supports 1GBPS.
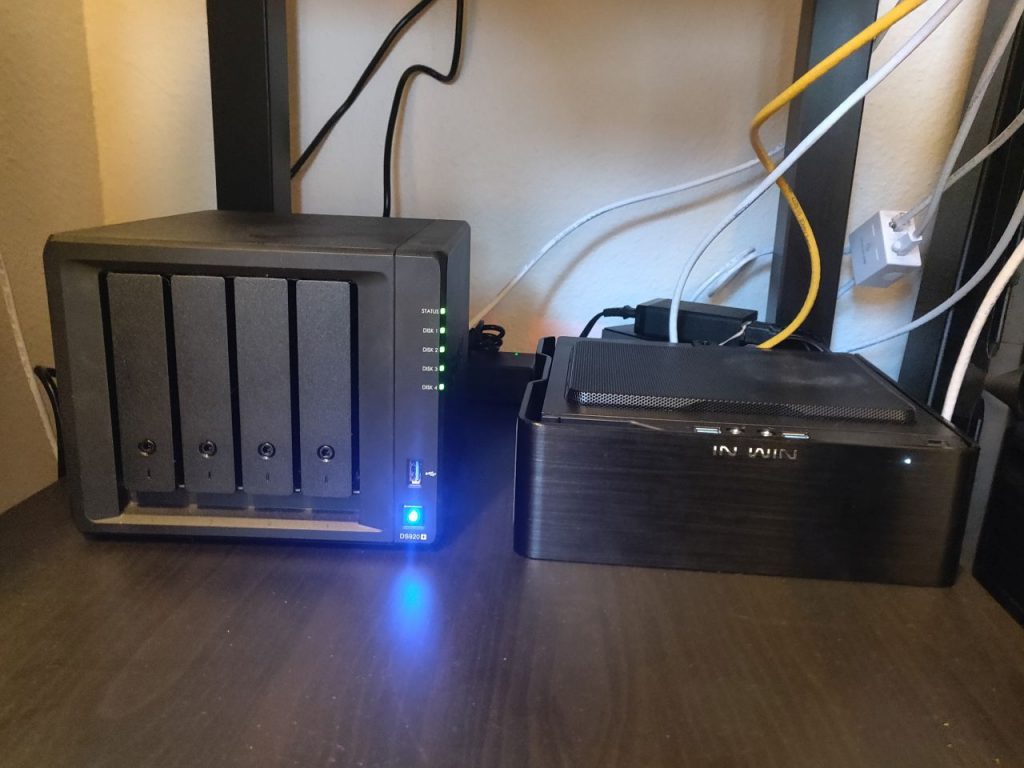
In my homelab, I’ve decided to split each layer into separate machines just to make my life easier. Workstations are physical computers on desks (eg Minibox or brandon-meshify), Compute is a single machine in my closet, Storage is a combination of a Synology 920+ (for usage) and a Synology 220+ (for onsite backups of the 920+), and Network is a combination of Unifi hardware (Dream Machine Pro, Switch16, 2 APs).
It’s definitely possible to combine this layering – I could imagine a server which performs both compute and storage or maybe a mega-server which performs compute and storage as well as networking. But for my own sanity and for some extra reliability, I’m choosing to host each layer separately.
Dependencies Between Layers
Furthermore, each layer can only depend on the layers below it.
The network is the most critical layer and every other layer depends on the network. In cases where the network must depend on other layers, workarounds must be present/documented.
Storage depends on the network, but otherwise has no dependencies. If storage is down, we can expect compute and workstations to not operate as expected.
Compute depends on storage and network; however, since the compute layer is by definition where applications should be hosted, there are a few instances of applications which lower layers might depend on.
Workstations are the highest layer and depend on all other layers in the stack.
Again, I have these rules to keep the architecture simple for my own sanity. If my NAS goes down, for example, I can expect basically everything to break (except the network!). I’m okay with that because creating workarounds is just too complicated (but definitely something I would do in my dayjob).
As I mentioned in the bullet points; there are some exceptions.
The compute layer runs pi-hole to perform DNS-level adblocking for the entire network. For this to work, the IP Address of pi-hole is advertised as the primary DNS server when connecting to my home network. Unfortunately, this means that if the compute layer is down, clients won’t be able to resolve IP addresses; I need to manually adjust my router settings and change the advertised DNS Server.
The compute layer runs Wireguard to allow me to connect to my network from the outside world. However, if the compute layer is down then Wireguard goes down which means that I won’t be able to repair the compute layer from a remote connection. As a backup, I also have a L2TP VPN enabled on my router. Ideally, my router would be running a Wireguard server since Wireguard is awesome – but the Unifi Dream Machine Pro doesn’t support that natively.
My brain depends on the compute layer because that’s where I host wikijs. If the compute layer goes down, my wiki becomes inaccessible (that’s also where I have wiki pages telling me how to fix things). To mitigate this, I use wikijs’s built in functionality to sync articles to disk and I sync them directly to the storage layer. If compute goes down, I should be able to access the articles directly from storage (although probably with broken hyperlinks).
My Fears
Overall, I’m happy with this homelab setup and it’s been serving me well for the past year. I’m a pretty basic homelabber and my homelab isn’t even close to the complex setups I see on YouTube and Reddit. My homelab is running a few game servers (Valheim, Ark, Minecraft), Media Hosting (Jellyfin), and some utilities (pi-hole, wikijs) all under proxmox. This is not nearly as crazy as the folks who have tons of security cameras, the *arr stack to automagically and totally legally grab media on demand, or folks who use their homelab to perform their actual compute-heavy dayjobs.
That said, I’m still worried about the lack of general high-availability in my homelab. For example: if my single UPS for all layers dies during a power outage, if my single compute host dies, if any of my networking equipment die. Any of these issues will knock out my homelab for several days while I wait for replacement hardware to arrive.
But then again, that’s probably okay – having multiple compute nodes or multiple network nodes is a huge added expense with perhaps minimal upsides. After all, I’m not running 24/7 services for customers – it’s just me and my family.
For basically as long as I’ve been doing my own software development, I’ve used “the cloud” to store a lot of my data. Specifically, I used Dropbox with the “packrat” option which backed up all of my data to the cloud and even kept track of per-file history. This worked very well – I stored all of my important information in my dropbox folder and when I got a new PC I would just sync from dropbox. When I was away from the PC, I could always access my important documents through the Dropbox App. Dropbox even gave me a reason to avoid learning how to use proper version control because I could just write code directly in Dropbox and let Packrat keep track of the rest.
The list of Dropbox pros is long – but after a decade of using it, I started to run into some problems:
Removal of the “public” folder: For the first 5 years of using Dropbox, I made heavy use of the “Public” folder. This folder would allow you to share files with anyone on the internet. I personally used it as a sort of FTP server to host all of my software and updates. Once the public folder was removed, I migrated to a proper FTP server which was much harder to use and diminished the value of Dropbox’s offering.
Cost: With Packrat, I was paying $15 per month. In total, I’ve paid ~$1,800 to Dropbox to store my files for the past decade. This is a lot of money – and it’s always been worth it for me to not have to manage things myself, but it’s something to consider.
Proliferation of Cloud Services: There are many cloud services available – and all seem to specialize in different things. Google Drive is great for photos and google docs, OneDrive is great for word documents, and Dropbox is great for everything else. Using all of these services meant that my files were never in one place. This isn’t a Dropbox problem – this is more of a me problem – but it was a problem nonetheless.
Security: Finally, Dropbox is nice for things that aren’t very private; but I found myself storing passwords and other important information in my Dropbox for lack of a more secure solution. Not good.
The cost of dropbox: I don’t have complete billing history, but I’ve definitely paid more than $1,800 in total
The Synology 920+
The issues with Dropbox nagged at me for a while, but I didn’t do anything about it until Black Friday of 2021 when I purchased a Synology 920+ with 4 Seagate Ironwolf 4TB drives on a whim. I didn’t have a plan – but I had the vague idea that I’d get rid of my Dropbox subscription entirely.
And that’s exactly what I did. The software that comes with the NAS is pretty nice (Synology DSM), so I was able to quickly setup RAID on my drives with single drive fault tolerance and began migrating Google Photos to Synology Photos, my media off of my desktop drive and only the Synology (to be consumed with Jellyfin), and my Google Drive and OneDrive files migrated.
The migration went smoothly, but was basically an archaeological dig through all of my old stuff. I found old screenshots (embarrassing), gamesaves (impressive), and plenty of old schoolwork that I didn’t care about across the 12 harddrives that I had lying around.
I haven’t thought through a proper full review of the 920+, but I’ve been pretty happy with it. The stock fans are a little noisy (fixable, but “voids the warranty”), the stock RAM is not quite enough (fixable, but “voids the warranty” if you buy RAM that’s not Synology branded), and the plastic case leaves a bit to be desired. But functionality wise, I’m happy with it and I’m also happy that I got an “out of the box” software experience and have no need to go digging for other software to manage my photos and files.
Once the migration was complete, I was able to cancel my Dropbox subscription. In all, I paid $1,115 for the hardware which is quite the lump sum (that would have paid for 6 years of Dropbox!) – but I now have 5 times the raw storage and more flexibility to store whatever I want with the peace of mind that it’s not being stored on someone else’s server.
It’s the homelab bug
But my adventure did not stop with buying a Synology. As soon as I got my files switched over to the Synology, I decided I wanted to use the built in Docker features to manage Minecraft, Valheim, and Jellyfin servers – but I soon found that running all 3 of these at once wasn’t a challenge that the 920+ was particularly equipped for…
So I ended up building another system to serve as my “compute” and relegated the Synology to be just storage (I’m hoping to have another post on that “other” system later).
And now that I had these two servers, I needed to buy a fancy network switch to hook them together and then buy a fancy network router to hook to the switch and then fancy APs to enable my wifi…
And even now, I have the aching feeling that running services (eg Photos) from the Synology is not a great idea – instead, I should move the Photos app to the compute layer. And once I do that, I’ll probably need to get a few more servers to ensure high availability for the apps I run.
Oh, what have I done?
The elephant in the room: backups
One of the major selling points of getting a Synology is eliminating the costly monthly bills that you have to pay to cloud providers. The elephant in the room with my new “homelab” is offsite backups which I am currently using Backblaze B2 to achieve. Backblaze B2 requires a monthly subscription, however, so I’m back to where I started: paying a monthly subscription for cloud services.
That said, the monthly subscription is cheaper and I only use it for automated backups (haven’t had to recover yet!).
So what’s the takeaway?
The pessimistic takeaway is that I’ve spent a lot of time and money building Cloud services myself. Besides security, I don’t think there are any actual tangible benefits to doing this – and I wouldn’t recommend it to folks who are looking for storage of a few terabytes.
I’d only recommend this if you have huge amounts of data or if you’re doing it for fun. I guess in my case, I’m having “fun”.