Introduction and History
About 6 years ago, I was in desperate need of a reliable webhost. I had a small personal website that I needed to be online most of the time, and I preferred to have something that was cheap, yet customizable. The solution that I found was HostGator’s shared hosting. The service was fairly cheap, had full access to MySQL servers, mail servers, and everything else that I needed. I stayed on their shared hosting plan for about two years. Then, I upgraded to a HostGator VPS.
I stayed on this VPS until about 2 weeks ago. The VPS was running CentOS and had WHM and cPanel installed. It was mostly managed, meaning that everything was installed and managed by the HostGator team and changes that I needed to make were usually much faster if I contacted the HostGator team directly instead of attempting to make the changes myself. This served my purposes very well since at the time I knew next-to-nothing about web server management. However, as I learned more about the way that web servers and UNIX systems worked, I desired to manage my own web server. Thus, I made the decision to switch to an unmanaged Digital Ocean VPS. There were also a few benefits of doing this.
The Benefits of Making the Switch
- The most notable benefit of switching away from any service to a Digital Ocean droplet is the decrease in price. I was able to nearly triple all of the specs of my webserver and still pay less per month. I could use this extra money to donate to some of the Open Source projects that I decided to use or to pay more skilled individuals to build a new website for me. Whatever I decide to use it for, paying less for more is something that should never be passed up.
- Speed is also a great benefit. Since Digital Ocean’s droplets all run on SSDs, there is a noticeable speed difference when working with my Digital Ocean VPS compared to my HostGator VPS. I’m not trying to say that my HostGator VPS was unbearably slow in any fashion, but rather than the Digital Ocean VPS is just so much faster.
- An unmanaged VPS is great. Instead of relying on other people to setup my system and maintain my system, with a Digital Ocean VPS, I am in control of everything. I get to choose what operating system I use, what software I install, and how frequently things get updated. It’s a nice shift from having people manage the entire webserver. Of course, there are some drawbacks to this. For instance, when a customer’s product spontaneously decides to malfunction, it is very difficult to work on a solution without knowing anything about the webserver itself. In this particular example, it is definitely useful to have people who know the server more than you; however, the goal is to learn through these experiences and ultimately know as much as the server-managers know.
- The cool factor is, well, cool. When you tell people that your VPS is from Digital Ocean, there is some sort of coolness to it. People seem to respect those who have an unmanaged VPS, especially from Digital Ocean. It’s a plus, I guess.
The Process of Switching
The great part about setting up a Digital Ocean VPS is that they charge by the hour; thus, there is no reason to fear wasting your money on a server only to spend hours setting it up (and ultimately failing). On top of this, they allow their servers to be dynamically resized and upgraded, which allows you to simply purchase the cheap server, mess around with it, and then upgrade when everything is ready.
With that being said, the first step of switching to a Digital Ocean VPS would be to set one up. I did exactly this. I chose the smallest VPS available, perused the options of software, and chose what I was comfortable with: CentOS 6.5. Despite running Arch Linux on my own machine and having previous experience with Ubuntu, I knew that CentOS had a lot of options available to it as far as webserver management software was concerned. The first steps were to pick that webserver management software.
The Web Panel
Like I said previously, my old VPS had WHM installed to manage all of the server software, packages, and cPanel accounts. Then, cPanel was used to manage individual websites. This software setup was perfect for my needs. In addition to myself, I also had several clients who paid for hosting on my VPS. These clients, of course, needed to manage their own website, so I needed some sort of web panel with strong admin/client separation.
The first WebPanel I ended up trying was Sentora, which is an Open-Source fork of the once legendary zPanel. Upon installing Sentora and having a look, however, it seemed to lack all of the features I wanted in a webpanel. Namely, Sentora lacked the ability to assign domain names to user accounts (Or maybe I simply did not see the option). This is something that was completely necessary for me so that I could keep track of all the domains that were hosted on my server. Although it had a beautiful design and seemed to be functional, I had to leave it.
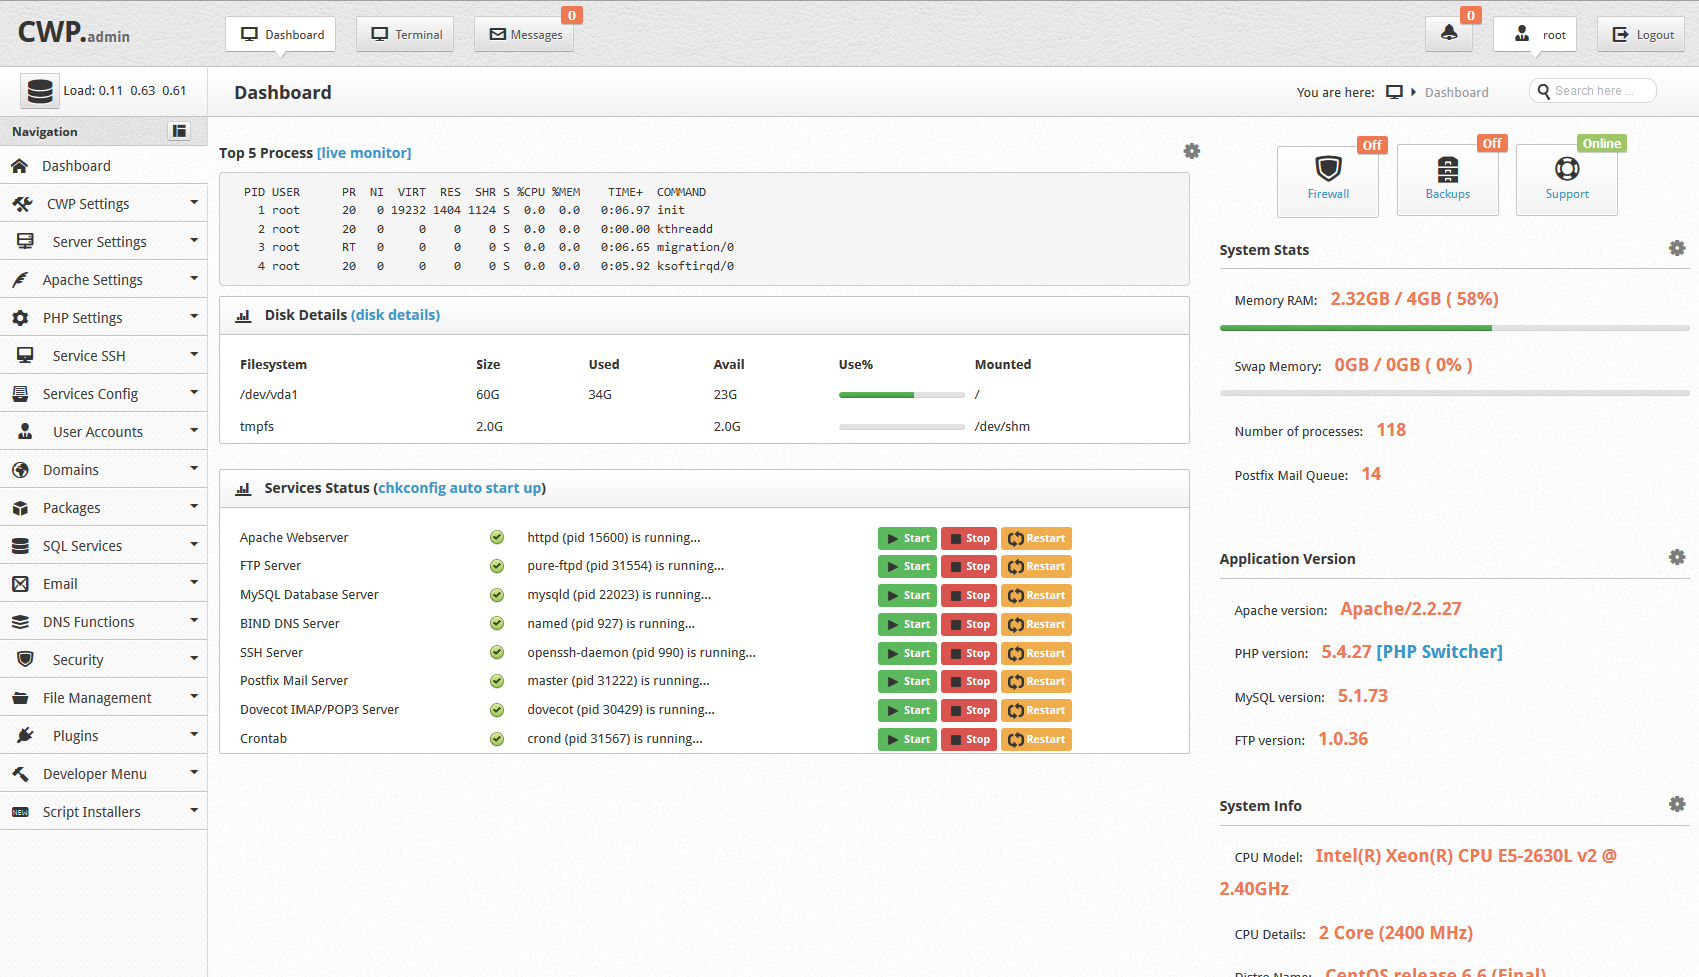
What I ended up going with instead CentOS Web Panel, which was very similar in design and functionality as WHM and cPanel’s Paper Lantern theme. The installation of the software was very straightforward and the steps were explicitly outlined on the CentOS Web Panel website. After installing the software, it’s very easy to setup the nameservers, FTP accounts, and other domain names on the server. With CWP, everything just seemed to work, which was a plus.
The WebPanel also featured a decent admin/client separation in its design. When one logged in with an admin account, the options available were very different from the options available when logged in with a client account. This is exactly what I was looking for. There are a few drawbacks to the webpanel, however. Since the software is free and in its early stages, it is not the most efficient webpanel available and feels slow or clunky when typing in information or editing fields. On top of this, the team is a little slow to update the associated versions of PHP, MySQL, phpMyAdmin, etc. However, you can’t ask for too much from free software. That is, afterall, the best part of CWP. It’s free.
CentOS Web Panel Admin Page
The NameServer Switch
Since I know nothing about how nameservers work, this was the hardest part of getting everything setup for me. I essentially had to switch my namesevers from the preconfigured HostGator setup to my own custom setup. Luckily, CWP has native support for this. Basically, the first thing that I had to do was go to my domain name registrar and configure my root domain (http://brandonsoft.com) to be a nameserver. I then pointed both the NS1 and NS2 subdomains to the IP address of my new Digital Ocean VPS. Once this was complete, I configured the ns1 and ns2 A Records on Digital Ocean’s DNS Management panel. Once this was complete, I made sure to change CWP’s nameserver options to reflect the IP Address of my Digital Ocean server. After waiting about a day for all of these changes to take effect, everything worked perfectly. Since all of the domain names that were hosted on my HostGator account were already pointing to my nameserver (whose IP Address was just changed), they automatically began to point to the new location.
The Data Migration
Now that all of the software was installed and all of the domains pointed to the right location, the process of migrating data could begin. This was a daunting task, of course, since I had about 10 websites worth of data whose files and databases needed to stay in tact, preferably without any noticeable change. Luckily, the process was actually rather easy to do. Of course, I made many mistakes along the way, so here are the steps that I took that ended up working properly:
- In the individual cPanels of all of the accounts hosted on my HostGator VPS (Which I still could access through the old IP Address of the server since the domain names were no longer attached), I performed a full backup and sent the .tar.gz files to the /home directory of the new Digital Ocean VPS using cPanels built in “backup-over-SCP” with the root account. This took a while, but I got a handy-dandy email notification when each account finished backing up.
- After all backups were completed, the .tar.gz files were named something like “-.tar.gz”. In order to quickly migrate the accounts into my new CWP setup, I had to change the naming scheme to “-cpmove.tar.gz”. Once this was complete, I could login to the admin account of CWP and create new accounts using the “migrate from cPanel” functionality, which automatically filled in the necessary information.
- Unfortunately, at the time of my migration, CWP’s “migrate from cPanel” functionality was not working properly. Thus, the migration didn’t actually transfer any data. However, it did seem to setup a MySQL user and a home directory in the same username that was provided in the .tar.gz backup file. Now that a home directory was created, the rest of the backup process could be completed. I started by (Still logged in with the root account) using
chown to change the ownership of the “.tar.gz” backup files and then used cp to copy them into the user’s home directories. After this was complete, I logged into CWP and made sure that SSH Shell access was enabled for all of the users on my VPS so that the next step could be completed.
- The next step was to actually process the backup file. This could be done by SSHing into the server using the newly created user’s SSH credentials. Once logged in, I extracted the backup file using
tar -xvf. This put everything into a nice backup folder. Inside of the backup folder, the entire user’s mail, MySQL data, and file hierarchy from the old HostGator VPS was maintained. In order to get their site up and running as fast as possible, I copied backup/homedir/public_html into their ~/public_html directory. This put their website online and made it viewable to others.
- Finally, all I had to do was restore the user’s MySQL data. There were two processes that had to be completed. The first of which involved restoring all of their tables. This could be done by navigating to the
~/backup/mysql folder and using MySQL to process all the *.create files and then all the *.sql files. This created all the tables and then populated them with their data. The command calls looked like
mysql -u -p < TABLENAME.create
mysql -u -p TABLENAME < TABLENAME.sql
Once this was completed for all of the files in the ~/backup/mysql directory, we would need to restore the MySQL user accounts and passwords that existed on the old HostGator VPS so that it would seem like nothing was changed. This could be completed my finding the file ~/backup/mysql.sql and calling its queries as the root MySQL user, as such:
mysql -u root -p < mysql.sql
After this is completed, everything should be setup.
The Final Moments
After all of these steps were completed, the entire server was successfully migrated. There were a few issued I encountered; mainly, the site would stop working after scheduled backups ran since the backup files ate up disk space and prevented the MySQL server from running properly. After backups were disabled, however, this issue was fixed.
After running the server for around 2 weeks without any issues, I decided to close my HostGator account. So far, I have encountered no issues and everyone on the VPS seems to be happy with CWP (Some people even said it was less confusing than cPanel!). The next steps I am going to take are customizing CWP to be branded for my company, and as I complete this task, I will post a guide.
Hopefully this post has helped you migrate your server or inspired you to do so!